Codfer
Adding HubSpot chat to your website is a simple yet powerful way to enhance customer engagement and support. In a recent HubSpot survey involving 100 U.S. consumers, 26% preferred live chat as their primary customer service contact method. Additionally, 59% of respondents wanted to interact exclusively with human representatives during live chat sessions.
In this easy guide on how to add HubSpot chat to your website, we’ll walk you through the steps to integrate the HubSpot conversation tool setup seamlessly into your website. Whether looking to improve response times or provide personalized support, HubSpot Chat offers an intuitive solution that boosts user experience and customer satisfaction. Learn how to install live chat on the HubSpot website and make the most of this valuable tool.
Adding HubSpot chat to your website has become essential for businesses aiming to enhance customer engagement and support. Here are the key benefits of using HubSpot live chat for customer engagement and support:
Add HubSpot live chat for instant communication with website visitors, responding immediately to inquiries. This real-time engagement fosters a connection, making customers feel valued and heard.
Add HubSpot chat tool so that businesses can offer support around the clock through chatbots. This ensures that visitors can receive assistance anytime, increasing customer satisfaction and reducing potential lost sales due to unavailability.
Engaging visitors in conversation helps capture valuable lead information in real-time. Activate HubSpot chat on-site to prompt users to share their contact details, facilitating smoother follow-up and nurturing.
The ability to automate responses to frequently asked questions saves time for both customers and support teams. Automation streamlines communication, allowing your team to focus on more complex inquiries.
HubSpot Chat provides a platform for quick issue resolution, reducing customer frustration. Prompt support leads to happier customers, enhancing brand loyalty and encouraging repeat business.
Adding live support to the HubSpot website can significantly enhance the user experience by providing immediate, personalized communication. Visitors can navigate your site more effectively with real-time assistance, reducing frustration and confusion.
Its seamless integration ensures that customers get the help they need without leaving the page, creating a smooth journey. Furthermore, by offering instant answers to questions or concerns, HubSpot Chat reduces bounce rates and keeps users engaged, ultimately improving the likelihood of conversions.
Recommended Blogs for You:
Set Up Site Tracking in HubSpot: A Comprehensive Guide
HubSpot AI Website Builder Review
Zendesk HubSpot Integration: A Comprehensive Guide
How to maintain your HubSpot Themes to ensure optimal performance
How Can I Use Hubspot To Build My Website: A Step-by-step Guide
Here’s a step-by-step process on how to add HubSpot Chat to Your Website:
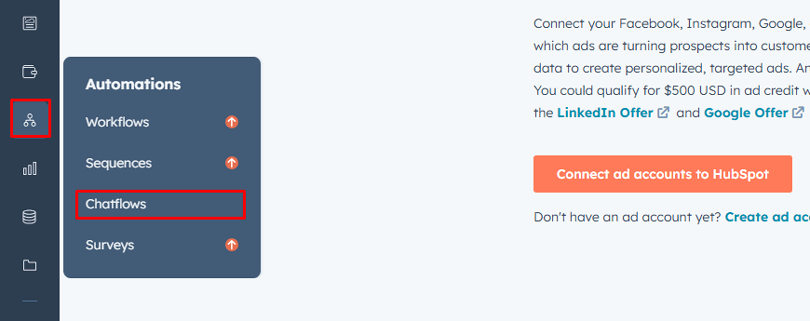
Start by going to your HubSpot dashboard’s Automation section and click on“Chatflows”.
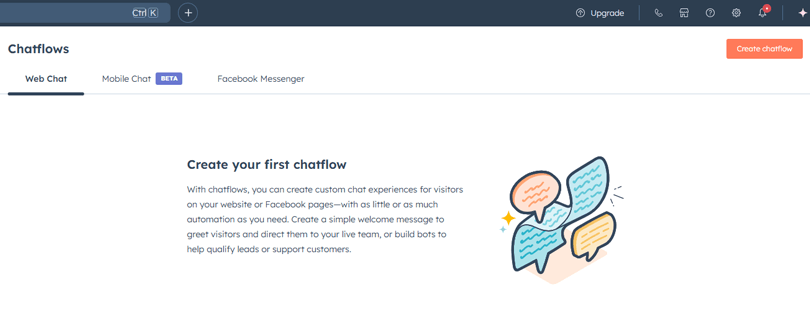
In the chat flow builder, you can find several options like web chat, Mobile chat, and Facebook Messenger.
Select your desired option (Webchat) and Click the “Create chat flow” button to initiate the HubSpot chat widget setup process.
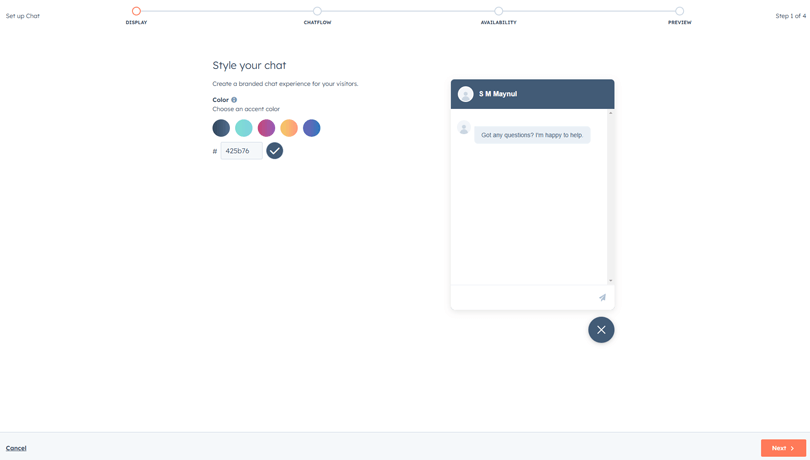
Style your chat: Adjust design elements, including colors, fonts, and the placement of the chat window. You will get a preview of the chat form on the right side of your window.
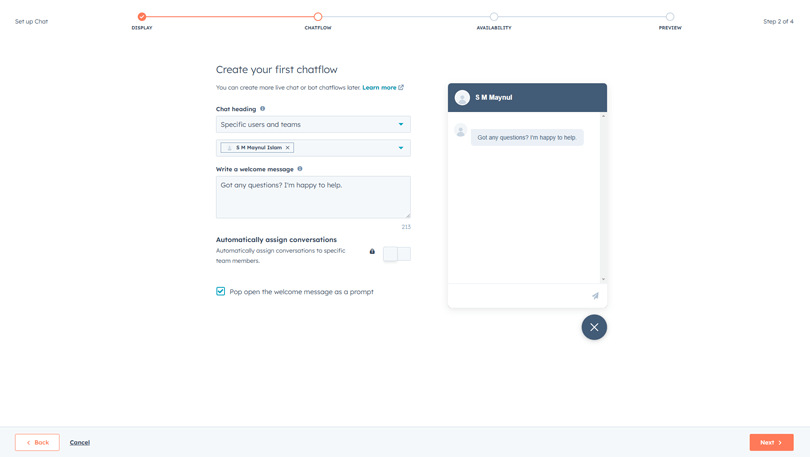
Welcome Message: Set the welcome message that visitors will see when they open the chat.
Offline Settings: Configure messages and behaviors for when agents are unavailable.
Routing Rules: Define which agents or chat queues will receive chats based on specified criteria.
Assign Team Members: Under the “Assign to” option, select a team member responsible for chat interactions and set their availability(working hours) according to their working hours.
Display Estimated Reply Time: Consider showing the estimated reply time so visitors know what to expect regarding response time.
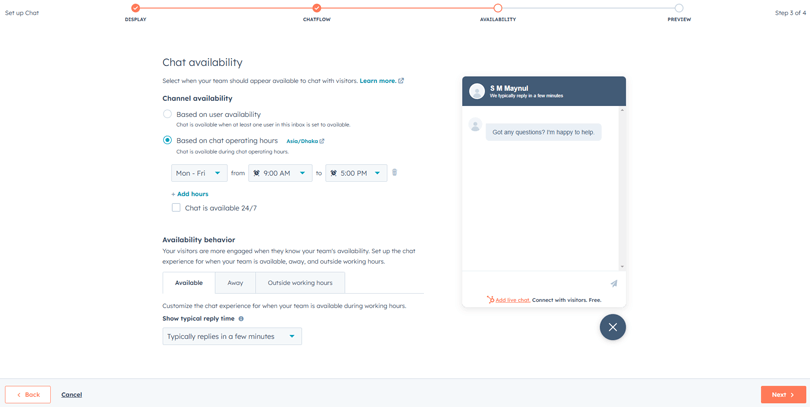
Preview the Chat Widget: Once you’re satisfied with the design, click “Publish”. A new popup window will open: “View message in Inbox.” Click on it.
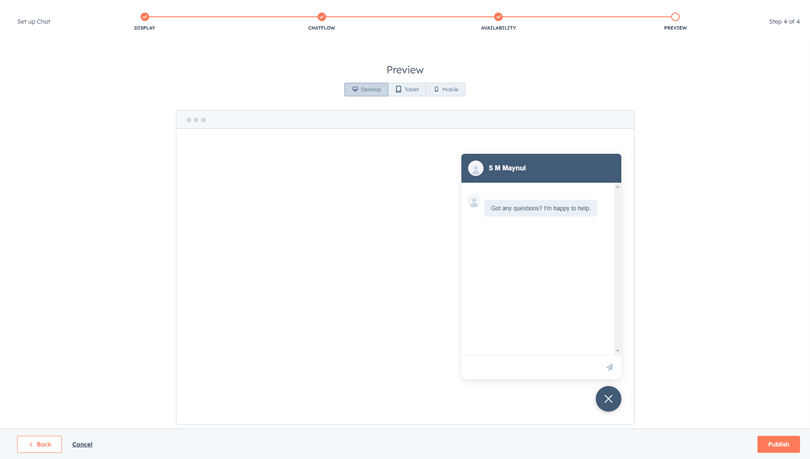
Click on the visibility status to add to website pages. Then Click on the “Edit” option

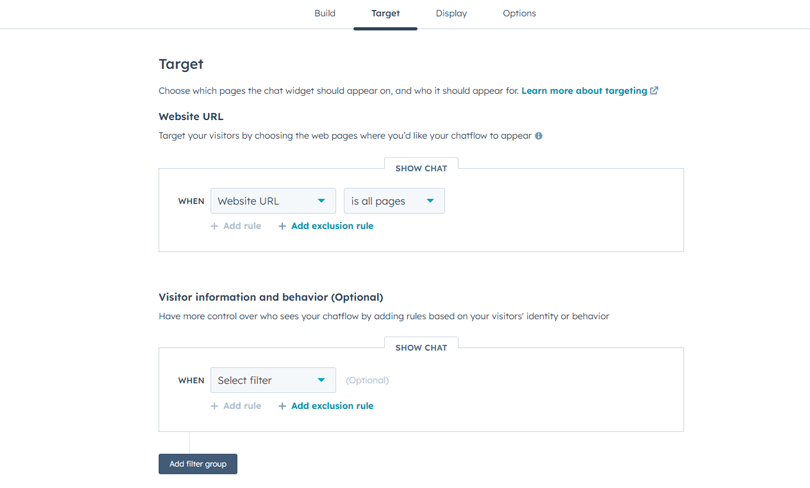
Go to the “Target” tab. Add defined page rules for which page the chat would be visible.
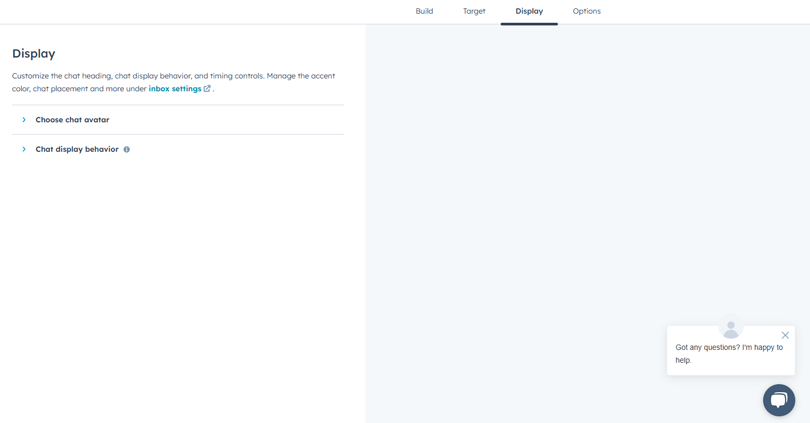
In the “Display” tab, choose the avatar representing the chat on your website.
The HubSpot dashboard makes managing chat settings, responses, and user interactions easy. You can customize chat flows, assign chats to specific team members, and track ongoing conversations in real-time. The dashboard also allows you to monitor response times, ensuring your team meets customer expectations.
HubSpot Chat integrates seamlessly with various customer support tools and platforms. You can connect it to your CRM, email, and ticketing systems to streamline communication. This integration ensures a unified customer experience by providing agents access to past interactions, enabling faster resolutions, and improving overall support efficiency.
HubSpot live chat is a tool that allows businesses to engage website visitors in real time. It enables instant communication, offers automated responses, and integrates with your CRM to provide personalized support, improving customer engagement and satisfaction.
To customize the HubSpot chat widget, navigate to Automation> Chatflows and select the widget you want to edit. You can modify the welcome message, design elements like colors and fonts, offline settings, and routing rules to create a personalized chat experience for your visitors.
Yes, you can assign chats to specific team members in HubSpot. Within the chat flow settings, use the “Assign to” option to designate team members or departments responsible for handling chats. It ensures efficient customer support and proper routing based on expertise or availability.
To preview your HubSpot chat integration process, navigate to Automation> Chatflows and click on the chat flow you’re working on. Once you’ve made your changes, click the “Preview” button to see how the widget will appear on your website.
Chat visibility rules in HubSpot determine where and when the chat widget appears on your website. You can set rules based on specific URLs, user behavior, or device type to ensure your chat widget is only displayed to relevant visitors.
Yes, HubSpot chat can be integrated with WordPress via the HubSpot plugin. After installing live chat on the website, you can easily add live chat to your WordPress site, allowing seamless communication with visitors and access to HubSpot’s CRM and marketing tools for enhanced engagement.
To sum up, integrating HubSpot Chat into your website is an effective way to improve client assistance and engagement. HubSpot chat raises the possibility of conversions while improving user experience by enabling real-time communication. Its seamless integration with other customer support tools ensures that your team has all the information they need to assist customers effectively.